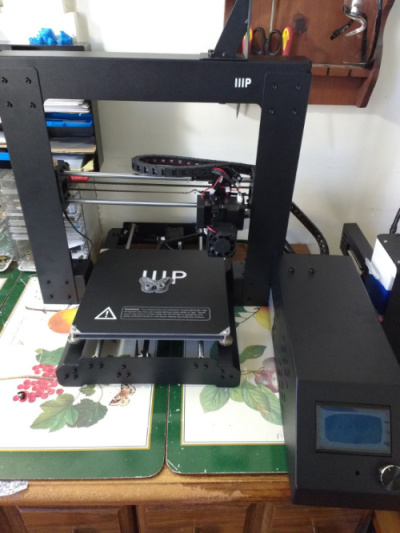
Maker Select V2
Printer: Monoprice 13860 Maker Select 3D Printer V2
Source: Amazon
Reviewer: Fran
A printer chosen based on two factors: How fast can it get here [2 day shipping, thanks, Amazon] and how easy is it to get parts for this. A clone of a clone of a clone, the bits of the Maker2 are about as close to standard as they come, and as my current printer was dead and the Maker only 320 bucks… yeah, okay, let’s do this thing.
Arrival and Unboxing:
Much anxious refreshing of the tracking page and huzzah! Printer has landed!
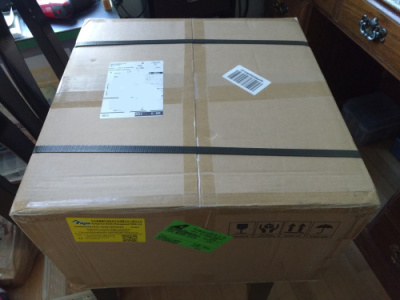 |  |
| ...holy crap that's a huge box. | So glad I cleaned off my workdesk in preparation.... |
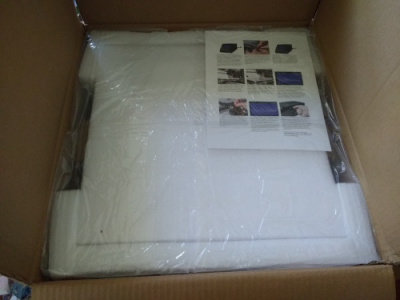
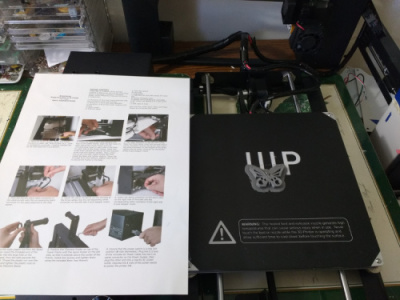
The first thing you will see when opening the box is the quick start guide. This guide is garbage. Seriously, just throw it out. Because in the BOTTOM of the box, hidden under the spare build plate is a manual that’s actually *helpful.* I missed this fact at first and wasted a lot of time making faces at the quick start guide.
 |  |
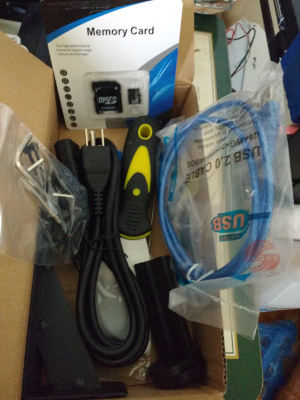
| Lurking under the foam | DIDN'T EVEN SEE THE THING FOR THE SPARE BUILD SURFACE. Also, hello sample filament. /chucks in the bin |
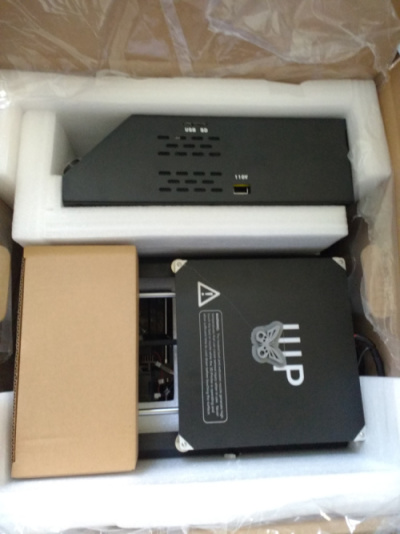
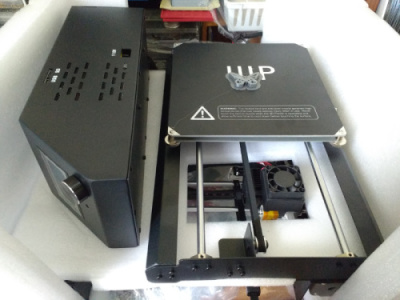 | 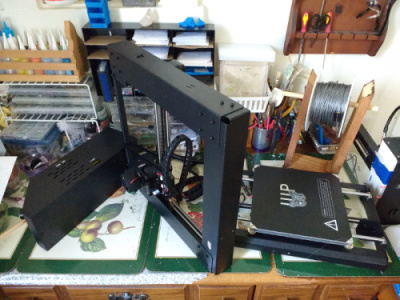 |
| More unpacking | Kinda sorta upright? |
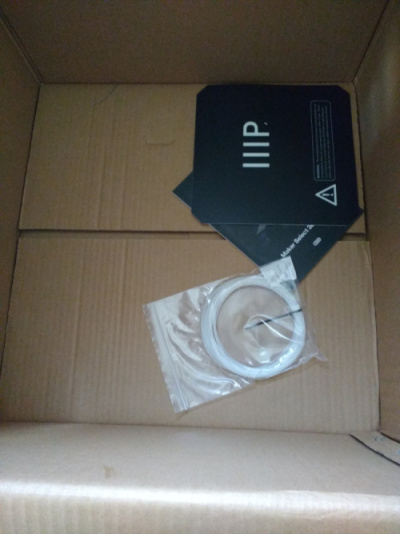
 |  |
| Box of bibs bobs and a heck of a paintscraper. Gonna wanna file the edges of that thing. It murders build surfaces something good. | Everything’s out of the box and foam and onto my workdesk, time to get this thing together! |
Assembly
As I mentioned before… the quick guide is just… garbage. The pictures are small and not helpful, and it leaves out a few steps and some of the more useful information that the manual has [like how all the things you have to plug in are nicely labeled with matching letters and that the pictures are actually the old model and there are no wingnuts. The manual has updated photos, but says that the photos are the old model in the captions… it also tells you to look at a diagram that does not exist.]
I spent a lot of time feeling stupid because I couldn’t figure out WTF the directions were on about and not being able to decode what the photos were even of.
But eventually I figured it out! (mostly. I realized after finding the manual that I had missed 2 screws. It was much more stable with those in…)
The 2nd half of the quick start guide was all about leveling the bed. The manual and the guide both fail utterly here, as they both say to turn the printer off so you can move the head and the bed around. But with the printer off and the motors disabled, the bed was impossible to level. One of the corners simply could not go low enough. Trying again with the motors engaged (and after playing with the z axis rod screws on the side that was the most borked) I finally got the dang thing leveled!
Compared to that PIA, loading the filament was easy peasy. Turn the thing on, warm up the hot end, delicately stuff the filament into the tiny hole on the top of the hot end, scroll down to the menu and have the printer inch that stuff forward until squiggles started pooling out.
The filament holder…. Is functional. The placement is pretty nice but the spool I loaded [foxsmart silver] wonked and whumped as the holder got caught in the spool. First mod on the “to do” list: get something round and smooth in that holder. ...and possibly look into just elevating the wood spool holder I made high enough to feed from up there. (because there’s no way in heck the makerbot spool I have is gonna fit on that thing. But there’s little that that thing *will* fit on... )
Finally all set up after about an hour and a half of fiddling and futzing. Onward! To….
Printing
The manual is helpful… if you want to run Cura. As Cura does not run on my computer, I use Repetier-host. This made setting it up a bit of a PIA because the manually just says “Chose this from the profile menu in Cura” and that’s that. Helpful. Really.
The manual does have some of the basic defaults in there as well, and in the end, the only thing I changed was the bed size, figuring that I could just adjust as I went, like before.
Loaded the memory card up with a few things… and then realized that the slot for the SD card was a bit bent. Nothing that couldn’t be fixed with a butterknife, however!
A nice function that I utterly forgot to use when starting is the preheat to PLA option. This avoids the annoying “first let the bed get to temp, then start the hotend heating” slowness. With that slowness, it was about 5 min to get to temp.
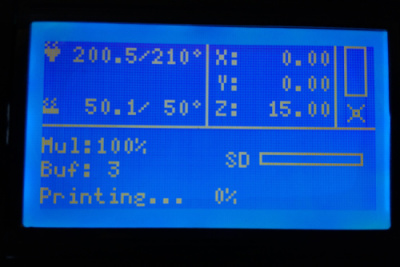
The screen reminds me strongly of a graphing calculator or an old gameboy. But not in a bad way. The bad part is the relatively loud beep the thing makes when you scroll through things and the triple beep when you select. But it’s pretty nice on the info it gives you, and if you scroll over after the print has finished, you get a nice little summary that you can go back to until you start the next print. [Later note: I was wrong. These are cumulative stats and can be gotten to at anytime via the scroll wheel when the printer is at it’s default screen] Seeing the amount of filament is also nice. This and the extruder menu allowing you to extrude a mm at a go allows for proper calibration without having to plug into the USB. (A nice bonus for me since the work computer is my only laptop and reeeally shouldn’t be used for this stuff. Even if it is…. Later edit: ALSO SINCE THE USB DIDN'T WORK.)
The build plate comes pre-covered with a sheet of some seemingly standard material [the spare one has a 3M logo all over the adhesive] and the plate itself is pretty hefty. Here’s hoping that means it’ll warp less...
The Prints:
Cali Cat (http://www.thingiverse.com/thing:1545913)
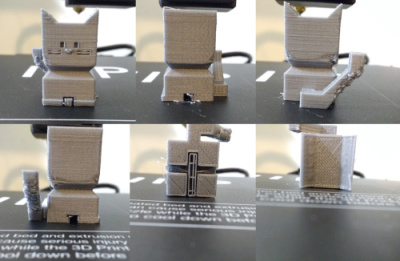
Hoooly crap the wobble lines. There’s some other “eh” going on here too but the windy seas banding caught my attention first, and sitting in front of this printer as it goes leaves no mystery to the source. This sucker makes the floor shake. Not enough to rattle the dishes, but enough to be felt. (If you have a neighbor with a far too large truck that they need to idle for far too long to defrost the windshield, you know that sort of rumble I mean here.)
First attempting at fixing involved lowering the jerk rate and speeds and flipping over the mats the printer was on so the cork side was against the frame. This helped some, but not enough. However, starting another test print, I watched carefully trying to figure out where the rumble was coming from. Releasing the stepper motors, I gave the bed some pushes and realized there was hella friction going on producing a rumble. The bed was attached two ways: to the rods and to the belt around the motors. One screw removed the belt, and did little to ease the friction. Some more disassembling later and it was very clear that the bearings around the tube were moving like crap.
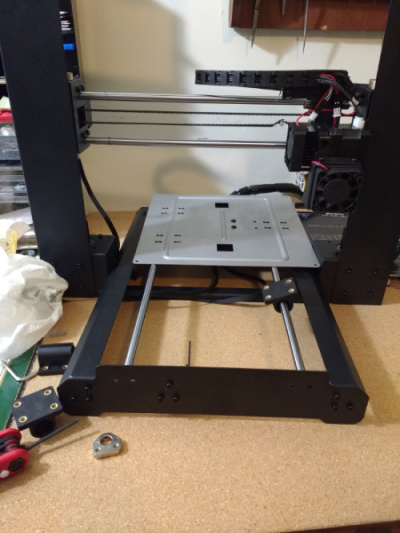
Two hardware store trips, two different sorts of lube, a lot of middle school jokes later and the bearings… were a touch better but still rumbling like thunder.
After procuring a block of foam from the thrift store (looked to have been a kids mat or part of a gym set) I was able to dampen some of the vibrations enough so that at least the floor wasn’t shaking so much, and decided, screw it, let’s just use this thing.
More and more printing resulted in slightly better prints. Things I was printing with textured patterns were coming out much better than anything smooth, and the smooth stuff…. … was a little better, but still bumpy and wavy. Good enough for now…
I also swiftly discovered that the paint scraper you get with the printer will murder the build surface. I took quite a few gouges out of mine before I filed down the edges and then just went back to the butter knife and plastic paint scraper I had been using before. Harder to use, but they don’t do any real damage to anything.
Wrapping it up
Overall, despite the massive headaches (some literal) the crappy bearings have caused… I actually kinda like this printer.
Is this a good printer for beginners? I’m gonna say… maybe to no. While technically only a few screws away from plug and play, this thing is basically a kit someone assembled for you. One the one hand, that means you can take it apart easily to fiddle with it and try and get it working better, but if you’re the sort of newbie who just wants something to work right out of the box… you’re gonna have a hard time.
There is, however, a lot that it feels like that can be done with this thing. The menu has a bunch of different settings and fiddly bits for tweaking, you can basically see all the functional parts, and the only real black box to it (quite literally in this case) is the CPU housing. If this were a more relaxed situation and not a “have to replace the printer I just fried to get these orders finished” I likely would not have dropped so many f-bombs over this printer. It's a learning machine; one you can take apart, poke and prod at and try and decipher so you can get it to be what you want.
So if your first instinct on encountering a problem is to take the thing apart and squint at the bits until you find the source, you’ll probably do alright with this printer. Just expect a few runs to the hardware store.
Mods & other things you will likely want
As a note, this is not a list of things to go out and get while you’re waiting for your printer, but more a list of things to keep in mind and figure out how to get on the chance you decide that yes, yes, I need this.
Shock absorbing pad: Vibrations are not a fun thing to be feeling all the time for you or the printer. If your bearings are like mine, you will want this.
New bearings: This was one of the only things that actually helped at all in improving print quality. Or at the very least, reducing the noise and vibrations....
Oil: On a friend’s recommendation, I got some 3-in-1 all purpose oil to try and sooth the rumbling of the beast. For what it could do with the crappy bearings, it did all right.
Frame stabilizer: General consensus online seems to be that Azza’s stablizers are the way to go. I have not tested this yet, but oh boy is it on my list…
(Note: They did not help)
New spool holder: The standard one is okay, but too short to hold some spools. Thingiverse has a bunch of these, so you can just print out one that strikes your fancy. There are a few that are a nice 1:1 replacement for the plastic bit of the stock holder.
Another fan: There are two fans on the hot end, one blowing on the inner workings, and one blowing on the build plate. Since the build plate fan only points one direction, 3/4ths of my prints have a matte finish, with the other quarter having a more glossy finish, the glossy side being the side the fan couldn’t reach. Depending how much that bothers you, an additional fan might be in order.
Fran Indexes (on a scale of 1-5, 1 being low, 5 being high)
Frustration level: 4
Satisfaction level: 3. (Later: 1)
“Value for the money” : 3
Quality of day 1 prints: 2 (Bleh)
Quality of day 2 prints: 2.5 (Meh)
Quiet Quotient : 1 (Loud)
Recommended knowledge level: 2-3
Workshop or Living Room aesthetic: Workshop.
Machine or Toy: Machine
Worth it? Eeeh..... see the "months later" postscript...
This is a printer that will need some work done. The bearings on the bed were utter crap and the thing shakes so bad you can feel it in the floor when it's printing. Default settings are a disaster. The firmware is pretty good in terms of giving you options and being able to fiddle around with things, however, it reads g-code and the hot end is pretty solid (two fans, direct feed. Needs a 3rd fan for more even cooling of the printed parts, however.) You will definitely want something shock absorbent to put it on and new bearings and likely to print out a support bracer for it (check thinigiverse) if you want anything of quality to come out of this printer. As it is with stock parts, prints come out with a lot of vibration lines.
Mine also had the additional problem that the SD card slot was bent in (fixed with a butter knife) and the manual was missing. The quick start guide is awful and doesn't match up with this version of the printer, so you're best off hunting for the manual online if yours is missing.
Overall, for the price paid, it's not bad, but it's basically a kit assembled by someone who didn't take much care to make sure it was all right. You will have to fiddle and fidget with it and likely dump another 50-100 bucks into it to get it to be good.
2 months later postscript
It did not take long for this printer to hit a major speed bump: A partial clog that would not clear that spiraled out to the end result of this printer laying unplugged and ignored for over a month now.
After trying all the usual ways of unclogging, even taking it apart and running wire through it, I was having no luck, so I decided to try changing the nozzle. Which would not budge for love or money. Eventually, the wires to the heat cartridge snapped and I threw my hands up and decide to just order a new hotend for the thing. And a few spares because hey, cheap.
Only none of them fit the dang thing.
The tube was too thin and too long to fit into the bracket the other hot end had been in, meaning not only did it not fit in right, but it also needed to be secured with a pair of nuts, which in turn made the entire thing not screw in properly with the fans. After trying to kluge a solution and make a spacer to deal with the suddenly too long problem, I smacked into another recurring problem this machine had:
At random times, something goes wonky in either the thermistor or the software, and it will say the temperature is 100 deg lower than it is, and it will try and get back up to temp. Which means skyrocketing temperatures that when it rights itself trigger a fail safe that kills the heat entirely, the output reading "def."
The pile up of problems with no easy solutions left me far too soured on a machine that had never given me quality prints despite the work put into the thing and I just unplugged it. It's been sitting, being an eyesore on my workdesk ever since.
Someday, I may tear it down and rebuild it entirely, give it a solid frame that doesn't friggin wobble or something but for now... I'm printing on other machines.
|